Sunday, July 27, 2008

Epiphone Valve Junior and the BitMo Trio Mod

My first Epiphone Valve Junior was one of the combos. Sounded OK but a little sloppy and very noisy. Sold it and never looked back. Since then, however, they've made a ton of improvements and now they are great little amps at any price.

Here's mine in original stock condition:


I got mine in like new condition for about a hundred dollars shipped from an online auction site. They go for that much give or take ten bucks all the time. It's a good deal. Buy one if you're considering it. Totally worth it. The sound to me is sort of Marshall-esque-good midrange bite and that crunchy AC/DC type of distortion. Doesn't get too terribly loud when you crank it either, which is a good thing. I can comfortably play it dimed for a while in the afternoon or evenings but not at night. It's a few degrees louder than a stereo at what I think of as normal listening volume if that helps you put it in perspective.

As I said, I like it a lot but I'm not one to leave well enough alone. It's a little dark sounding for my tastes sometimes (my cabs have kind of a dark sound to them, if you have some brighter Celestions or something this'd probably be great) and could deal w/ a little more names. After looking into mods for some time, I decided on the BitMo Trio mod, which you can get on the internets for about fifty bucks. It adds a tone knob, gain boost and three different gain voicings.

All of this looks like a few parts in a bag once you get it in the mail:


Now to install these mods, first thing you have to do is get in the amp. Valve Juniors have self-discharging power supply capacitors so they are relatively safe to work on. Don't be afraid to roll up your sleeves and get to work on this as a first amp project. The voltages that can build up in tube amps and knock you on your ugly ass should be rendered harmless. However, you can never be to sure so the standard advice still stands: don't be a retard.

To open it up, first you have to take off the back:


It's held on by screws. Turn them counter-clockwise to remove them. There are then some larger screws on top you need to remove. They're hidden under little plastic things, which I always thought were a bit tacky but, you know, if don't want little cost cutting measures like this, buy a more expensive amp:


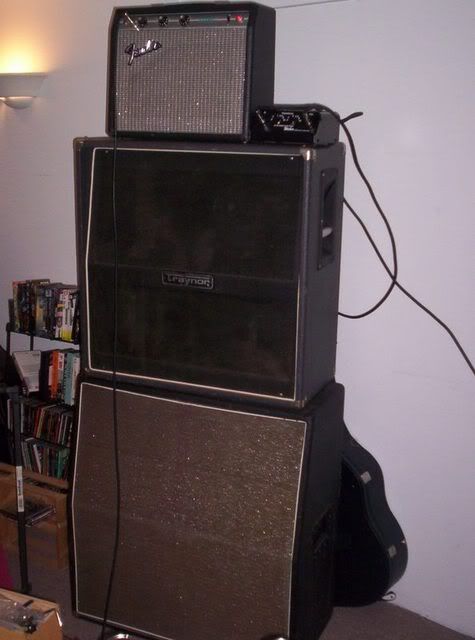
The cab is designed such that the amp-part doesn't just fall down when you remove these screws. You have to slide it out. And it looks like this:


Note: I am not drinking whiskey but I do keep it on my workbench/kitchen table for emergency purposes. You never know when things are going to get too complicated to handle properly sober.

Next step is to drill the holes for the new controls. Don't rush this and wear safety glasses. The BitMo kit comes w/ a template to place the hole:


I just poked a hole and made a little mark w/ a sharpie. That one's for the tone knob/gain boost. The one for the three-way switch you just gotta guess on.

To drill these suckers, you need to be patient. Buy some good quality drill bits for drilling metal. You probably won't be able to get away w/ just buying a quarter inch and three-eighth inch bits. They're too big for one pass. You need to start w/ a smaller bit and work your way up. Go in about eighth inch increments maximum. Be careful and let the drill do the work. Don't try to push it though any faster than it wants to go. I put some tape over the marks to keep the drill from scratching up the faceplate if it slipped (and it did).

Here's the finished holes:


Now, from here, you have to actually install the mod. This is the frustrating part so I didn't end up getting all too many pictures. You're in luck though since GearScore has an excellent page on it. Between this and the very good instructions that BitMo sent w/ the mod, it was fairly simple to get it all up and running. I soldered everything to the pot and too the switch, installed them and then soldered them to the top of the circuit board. Easy.

The one trick, which I stole from that GearScore page I linked to, is to use a pair of vice grips to hold things while soldering them:


Holy crap! That makes life so much easier I'm embarrassed I didn't do it until now. Anyway, that up there is the gain voicing switch w/ all parts attached. The tone knob/gain boost looks about the same but I forgot to get a photo.

Here it is all installed:


I had a bit of trouble on the three-way gain voicing switch but other than that it was easy. It's easy to get turned around by the schematics BitMo includes so be careful. It's not necessarily the best way to do things but I just soldered the leads to the top of the board. Works but it is a little sloppy.

Here she is all put back together:


I didn't do the water slide decals because I screwed up all the practiced ones I tried. I guess it would look a little cooler w/ them.

As far as how it sounds, it's a big improvement over an already good tone. The gain voicing switch just gives you three levels of gain, really. The higher gain settings seem to get a bit more oomph in the high midrange as well. The tone knob is nice too. It's not the most versatile thing in the world and seems to work something like a high end filter though it does add a bunch more high end than is available stock just by being there. The gain boost, adds some lows back in and is what can really take you over the top when you got the thing cranked.

Overall, not a bad way to spend a Sunday afternoon. I used to use an OD pedal to really crank the Valve Junior into rocking distortion territory but now it's totally unnecessary and sounds better besides. I'd recommend this to anyone as an easy first mod or a way to get a killer small tube amp for the price of a decent distortion pedal.

Tuesday, July 22, 2008

Making Neck Pockets, Screwing Up, Making new Plans

I took advantage of the nice weather a couple weekends ago and had a crack at routing out the neck pocket on the cheapo guitar. Rather than use normaly router bits and a template following kit, I decided to use a template following bit. It has a little bearing on it that rests against the edge of the template which you can see here:


Here is how it follows along the template. You can see that the bearing keeps the router bit from cutting into the template:


After my first crack at, I found that for some reason it didn't cut it completely and there was a little bit of wood still sticking up on the side:


I solved this problem by moving the template over a bit and routing it off. Bad idea. It turns out that it wasn't that the pocket on my template was wrong but that the little stem for the neck was a little too wide. Now my neck pocket is a little too wide for the neck. I am getting kind of ticked about not having my baritone neck, which was what was destined for this neck pocket on anything and this is yet another guitar that won't turn out to be up to snuff so I think I'm just gonna buy a decent Squier Tele and put the baritone neck on that and use the Squier neck for this guy. It kinda sucks that on my second try, I can't make a guitar better than a Squier but there it is. Squier has CNC machines and millions of dollars. If I had that, I'm sure I could make a damned fine guitar.

Anyway, w/ that done w/, I used a template and the same bit to carve a little recess for the control cavity cover. Ended up having to free-hand it a bit and it's not perfect but pretty good. You can see it's a little rough around the edges:


The wood on this guy is a little thicker than a standard tele body so I wanted to make a little recess for the neck plate too. Note to self: make sure that router bit is deep enough that it doesn't destroy your template:

Lots of work down the tubes there. At least it doesn't look so bad I won't be able to fix it up a bit w/ a sander:


After these two mistakes, I decided to call it a day. Sometimes you just gotta leave well enough along. On the brightside, at least I'm not this dumbass fly who got stuck in the carpet tape I use to hold my templates in place. He's dead dow:


Fly: 0
Frank: 1
Luthiery: 2

Second place isn't bad, I guess.

Wednesday, July 9, 2008

The Linux/Ardour Recording Rig

So about a half year ago, I got a wild hair and decided to build myself a computer recording rig for the purposes of creating demos for my band Sun Splitter and for whatever else I so chose. Given that it's one of my projects, I put it in it's natural place: the back burner. That is, I did until a certain North American government decided to give me six hundred dollars to save me from the terrorists. Not only do I appreciate the sentiment, I also appreciate having enough cash to spend on yet more musical equipment that I don't really need.

I bought myself a decent (or so I thought) motherboard case combo from an online retailer and four gigs of ram to which I added four two gigs I had sitting around. (This is absolutely ridiculous and unnecessary, I only bought this much ram to be a jackass. Also, I have six gigs of ram. Up yours!) I got a decent but lower-end AMD dual-core microprocessor, a used and slightly damaged flat screen monitor of eBay for fifty bucks and w/ an old mouse and keyboard I had laying around, I was in business.

The recording software I chose is called Ardour. I love it. It's open source and finicky and pisses off my whole band every time I record on it so it's just about perfect for me. I use it and subscribe to it monthly w/ a small donation. You should too. The thing about Ardour though is it's only for Linux and MacOSX. Having enough self-respect to avoid OSX, I opted for Linux. You should too.

I've tried a few Linux distros in my day and ultimately my favorite proved to be Ubuntu. Some nerds will bag on it for not being 1337 enough but, honestly, if they care so much about their Linux distro being hard to install, they are probably pretty boring to talk to anyway. Ubuntu is easy to install on most systems and they have a great forum if you get stuck. There's enough people on there that there's someone bored enough to help you w/ the dumbest n00b question. Don't be shy. The other nice thing about Ubuntu is there's a package called Ubuntu Studio that includes everything you need to get your audio workstation up and running. It's a bit bloated though as it contains all kinds of vidoe and picture editing. The best way, I decided, was simply to install vanilla Ubuntu and then install only the audio package of Ubuntu studio from there.

W/ that taken care of, I needed two more things, the most important being an audio interface for my computer. Normal computer soundcards simply don't cut it for serious recording. Thankfully, the other guitarist in Sun Splitter happened to have a Lexicon Omega USB interface laying around so that got us started. USB interfaces really aren't the best, better to have firewire or PCI (even though PCI is old there is good support in Linux), but we get by OK w/ this. The Sun Splitter tracks we have on the current page as of now were recorded using the Lexicon and a Windows laptop. He also provided the other thing we needed, "studio monitors." I put that in scare quotes because we're actually monitoring w/ an old stereo reciever and some nice stereo speakers he just had laying around.

Here it is:


You can't see the computer because it's under the desk and I'm not getting down on that floor for any reason. It's filthy.

Tuesday, June 3, 2008

A Change in Scope - Luthiery, Gear Reviews and More

Between my numerous hobbies, my band Sun Splitter and my desire to remain absolutely motionless seventeen hours a day, I am not spending as much time on my guitar projects as I would like and am thusly running out of stuff to write about here. However, I do like to keep my wonderful readers engaged in and informed of the latest goings on at the Logical Compound so I have no choice but to broaden the scope of this internet. Basically, I am just gonna post whatever I want and you're going to have to read it because you have a Logical monkey on your back and you just can't help but to return time and time again. I am gonna keep it gear and project related though so you will still get your fix of pure sonical Logic. I have a recording rig set up finally--which I will explain in a later post--so I'm going to hopefully compliment the tales of my haphazard adventures w/ dangerous power tools and guitar shaped objects w/ general gear reviews and sound samples.

Sunday, May 18, 2008

Fun W/ a Fender Champ

I bought a Fender Champ three years ago. It's from 1975 and has been modded so that it supposedly sounds more like a tweed Champ. Don't know what they did exactly but it sounds great and looks sweet.


I have had the same tubes in it for a year and it's going strong but I wanted to try something different. Tubes are really easy to change in a Champ. It is a cathode bias amp so you can just pop the power tubes in and out w/o adjusting anything. Supposedly, you can make adjustments in the bias of the amp and get it sounding better but I've never tried it and it seems to be working fine how I've been doing it. One of these days, curiosity will get the best of me and I'll go poking around in there.

Step one. Remove back plate w/ screwdriver:


They are Phillips head screws. You turn them counter clockwise to remove them. This exposes the tubes. You could probably just work around the cover but it'd be a pain. The Champ has three tubes in it:


From left to right, the first is the rectifier tube which is a 5Y3GT, the second is the 6V6 in the power section and the last is the 12AX7 preamp tube. Good stuff. So basically to get these guys out, you just grab hold and pull:


Be careful putting themin. You need to get the pins lined up. Power amp tubes have a little key that prevents you from putting them in the wrong way but preamp tubes you just have to be careful w/. Here is me putting a power tube in:


The one thing to be careful of is the tubes get hot if you've been playing. The rectifier tube swaps out the same way. I replaced it w/ the same kind, Sovtek, so it wasn't interesting enough to me to take a picture of it.

The particular tubes I tried were a reissue Tung-Sol 12AX7 and a JJ 6V6. I forget what kind of preamp tube I had in there but it was Chinese and sounded pretty good. I love the Tung-Sol though. Very tight sounding and clear but still very warm. It added a lot to my tone and I'm very pleased w/ it. The JJ power tube I wasn't so happy w/. It was slightly warmer sounding but in a muddy way that I didn't care for. To be fair, though, I am using a vintage Jan 6V6 that I got as NOS so the cards are kind of stacked against the JJ. NOS preamp tubes are way to damn expensive for me so I just go w/ new ones and have been fairly happy.

The other cool thing I did for my Fender Champ is build an adapter so I could plug it into a speaker cab:


It is very easy to build. You just need an RCA plug and a normal quarter-inch mono jack. To put it simply, you solder wires between them and you're done. I wrapped some of that shrink wrap tubing for wiring over the RCA to protect it. Couldn't really do much on the quarter-inch jack but it's held up for a couple years now.

The best part about this five-minute project is it allows me to do this:


I use a Weber Z-Matcher to match the impedances of the cabs to the amp. It is a wonderful device and very well built. Buy one. You'll find a use for it.

The two cabs I have going are a Traynor 4x10, which is a strange beast. It came w/ an old Traynor solid state head. The head and cab sound great together. But the head doesn't sound good w/ anything else and the cab is only so-so w/ other amps. I only keep it in my rig for the machismo factor. Say what you will but I like having a full stack in my living room and keep it as a matter of principle. The bottom cab is a Kern 4x12. It was made in the 70s in Chicago and is freaking awesome. It's my favorite 4x12 in the world. Kern still makes some bass gear now but their old stuff is super rare as far as I can tell. I actually sent them an email about this cab to see if I couldn't learn some more about it. Whoever I talked to was like, "Yeah, we used to make those," and that's about all I know about it. The speakers are some square-backed Eminence models and are beat to hell but still sounding good.

Anyway, that's about all I have to say about my Fender Champ at the minute. The silverface ones like I have are still pretty cheap and hands down better than the cheap little tube amps people are putting out now in terms of build quality. Tone is a matter of personal preference but I think this thing sounds better too.

Tuesday, May 13, 2008

Sunn Concert Bass

Recently, through of inquiries over the internets and train rides to and from the south suburbs, I acquired a Sunn Concert Bass free of charge from a gentleman named Tariq who plays in the excellent south of Chicago metal band Couldron, who are looking for a new drummer at the minute should you happen to be one. The only caveat was that it was in non-working order. Some asshole had apparently decided it would be a good idea to let the magic smoke that typically resides in capacitors, transistors, diodes and other such enigmatic electronical elements into the outside world where we all know it should not be. My task was to put it back in there.

I live my life car-free so it is often a trial to get out to the 'burbs. I knew it was worth it though as soon as I set this magnificent bastard on my speaker cab at home:


Looks pretty sweet, don't you think? How'd it sound? Well, at this point, it was still broken so it sounded like crap. I was hopping that the magic smoke may have found it's way back in there on its own but, sadly, that was not the case. Guitar sound would come out of the amp but not much and a ton of buzz came w/ it. Obviously not the best situation.

I opened it up to see what was up. Bear in mind, I followed the proper safety procedure of not being a retard before I started probing around. If you are a retard, I recommend you not open any amps up.

These are the amp guts:


At this point, I realized that somebody had actually tried to put some kind of magic smoke back in there. I can't say what kind but, seriously, this thing utterly reeked of nag champa incense, leading me to suspect that it'd been tampered w/ by a hippy at some point.

Closer inspection lead me to my first clue, two burned out resistors:


Even though I knew it wouldn't work, I tried swapping out those two resistors. The only good thing to report here is that only one of the resistors burned up this time. Apparently, the other one had just been taken out by the first one. I was one resistor down now but at least I had something to show for it. I replaced the one that burned up again and set off about the internets to find the real source of my problem. After some research, guided by several fine gentleman on the Unofficial Sunn Musical Equipment Web Site, I managed to narrow down the source of my problems to a few transistors in the power section. I am not sure if this is normal but they are stuck to the back of this amp and covered w/ little plastic pieces:

You just have to unscrew the screws and they pop right in and out, no soldering required. I tested them using a multimeter and the method described on this page. Three of them were bad out of five. Good thing I ordered four. Once replaced, it fired up just fine. It's loud as balls and your mom keeps calling me to ask about it. I've had it down at my band Sun Splitter's practice space for a couple weeks now and it's still going strong. Sounds pretty good for guitar or bass but I use it w/ my drum machine, Sober Bill. Here's the full rig:


As I said it's been going strong for a while now and I'm happy w/ it but I posted some pics of the board on the Sunn forum and someone noticed that a couple electrolytic capacitors had leaked out some of the crazy capacitor juice that's inside of them. I am OK w/ this since it works anyway but they're telling me that those caps could short at anytime--leading possibly to total protonic reversal--so I'm gonna replace them pretty soon. There's also some old resistors in there that I want to replace as some have drifted pretty significantly over the years. I will, of course, keep you posted.

Monday, May 12, 2008

The Un-Baritone Guitar

So I had to come to terms w/ something about my baritone guitar: It was cool, it sounded and played OK but I just needed to accept the fact that it is simply not that great. It's a nice first try but that is all I can say about it. I've decided that it is not worthy of my beautiful Warmoth neck so I've replaced it w/ a dirt cheap no-name neck from eBay. It's a load off my mind saying that out loud.

And I'm not kidding when I say no-name. It literally doesn't have a brand name at all on it's vaguely Telecaster-ish headstock:


I have no problem w/ the lack of name-brand and, in fact, I appreciate not having to shill for whatever company imported this son-of-a-bitch from French Indochina. What I do have a problem w/ is the fact that the holes were drilled in the wrong damn place. Not only that, they are too big for a normal neck screw. I filled them in w/dowels and re-drilled them, no problem. It actually fit in the neck pocket better than the Warmoth neck because it was too big.

Of course, that could not possibly be the end of my problems w/ this thing. The fact that it fit better, meant I got it on there straighter which made it a apparent that the bridge was in the wrong place so I had to move it again using this same procedure. And if that was the end of things, I'd have been pleased but it wasn't. Now that the neck was straight and the bridge was in the right spot, the pickups were no longer in line w/ the strings. Blast! There's really not much I can do about it w/o redoing the whole damn thing so I'm leaving it like that for now. I also rewired it so it didn't have all that goofy stereo crap going on, which was always weird and problematical and I never used for anything other than screwing around. I also unhooked the push-pull pots I was using for pickup selection and threw a Gibson-style toggle sort of awkwardly into the mix. Works but it's kind of cramped.

I also had to level and crown the frets to get it playing w/o a hideous amount of buzz. The neck really was a trainwreck. In hindsight I wish I hadn't cheaped out and got something decent. Here is the guitar w/ it attached:


Now that is one fine fiddle! Seriously, it's not that bad. If I ever get around to it, I'll re-rout the pickup slots so I can move them where they need to go and then make a pickguard to cover all the mistakes up. If I really wanna get into it, I can fill the wood and refinish in a solid color. Might be worth it as I can fix some other crap too while I'm at it. It's still pretty fun to play and having the pickups out of whack doesn't seem to affect the tone much at all. The neck is a big fat vintage baseball bat so it's good to practice on. Makes my other guitars feel tiny and insignificant, thusly allowing me to better bend them to my will.

The Warmoth neck is now going to go on the cheapo guitar project. Somewhat ironical but there you go.